There’s a specific kind of disappointment that hits when you’re standing somewhere genuinely stunning, you nail the exposure bracketing, stitch the panorama, and then open it in Lightroom to find something that looks like a beige rectangle. I’ve been there more times than I want to admit. The camera captures data, not drama, and the gap between what you saw and what the file shows is exactly where post-processing lives.
That gap is what this tutorial is built to close. In this KelbyOne tutorial, Scott Kelby walks through the complete post-processing side of an HDR panorama workflow, picking up right where the first part on camera settings left off. Watch the full tutorial on YouTube if you want to follow along directly. What follows is my breakdown of each step, with the specific moves that actually matter.
The workflow is deceptively straightforward, but there are a few decision points where the difference between a good result and a mediocre one is a single slider or a tool choice. I want to flag those clearly as we go.
Step 1: Diagnose the Auto-Tone Result Before Trusting It
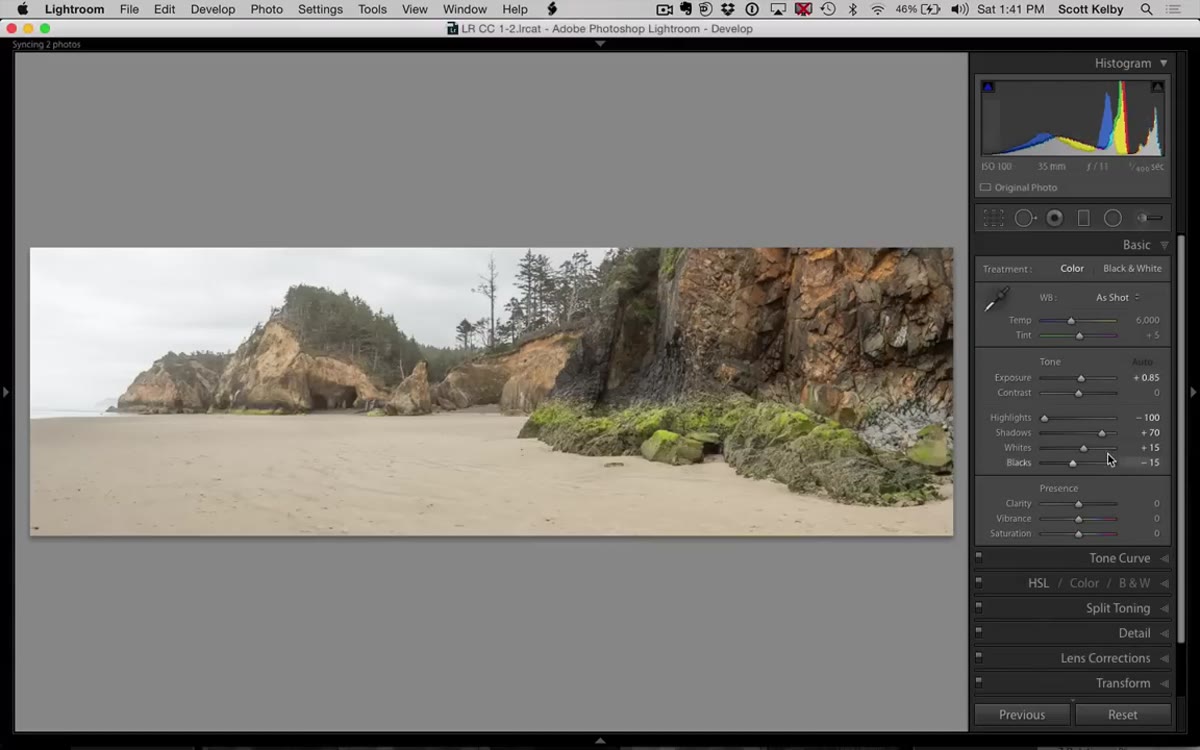 Lightroom Basic panel showing auto-toned HDR panorama sliders
Lightroom’s auto-toning feature runs automatically when you merge to HDR, and it’s genuinely useful about half the time. The other half, it overcooks the exposure and leaves you with something too bright to work with. Kelby’s first move is to look at the image critically rather than assume the auto-tone got it right. In this case, it didn’t. The image reads overexposed and flat simultaneously, which is a common HDR merge outcome.
The diagnostic question here is: does the image look like the scene, or does it look like a file that was processed? If the sky is blowing out and the shadows have no depth, the auto-tone made the classic mistake of chasing a histogram instead of a mood.
Step 2: Correct Exposure and Contrast in the Basic Panel
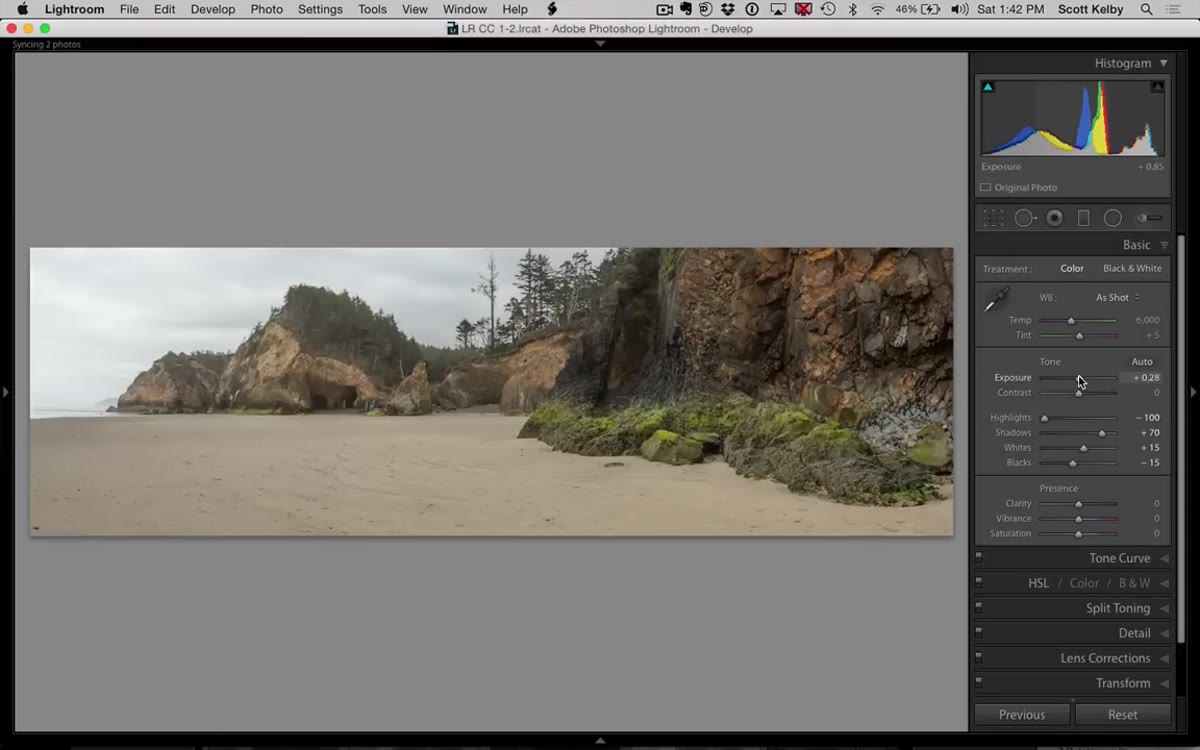 Exposure and Contrast sliders being adjusted in Lightroom Basic panel
Pull the Exposure slider down until the image stops feeling blown out. Kelby doesn’t chase a specific number here, and neither should you. You’re looking at the image, not the value. Once the overall brightness lands in a reasonable place, push Contrast up to counteract the flatness that HDR merges often introduce. The merge process blends multiple exposures in a way that can soften the tonal separation between midtones and shadows, and a contrast boost restores some of that snap.
After those two moves, open the Shadows slider slightly. HDR files carry a lot of shadow detail, and lifting them a little reveals texture without making the image feel fake. The goal at this stage is a solid, workable base, not a finished image.
Step 3: Use the Adjustment Brush to Selectively Lighten Dark Areas
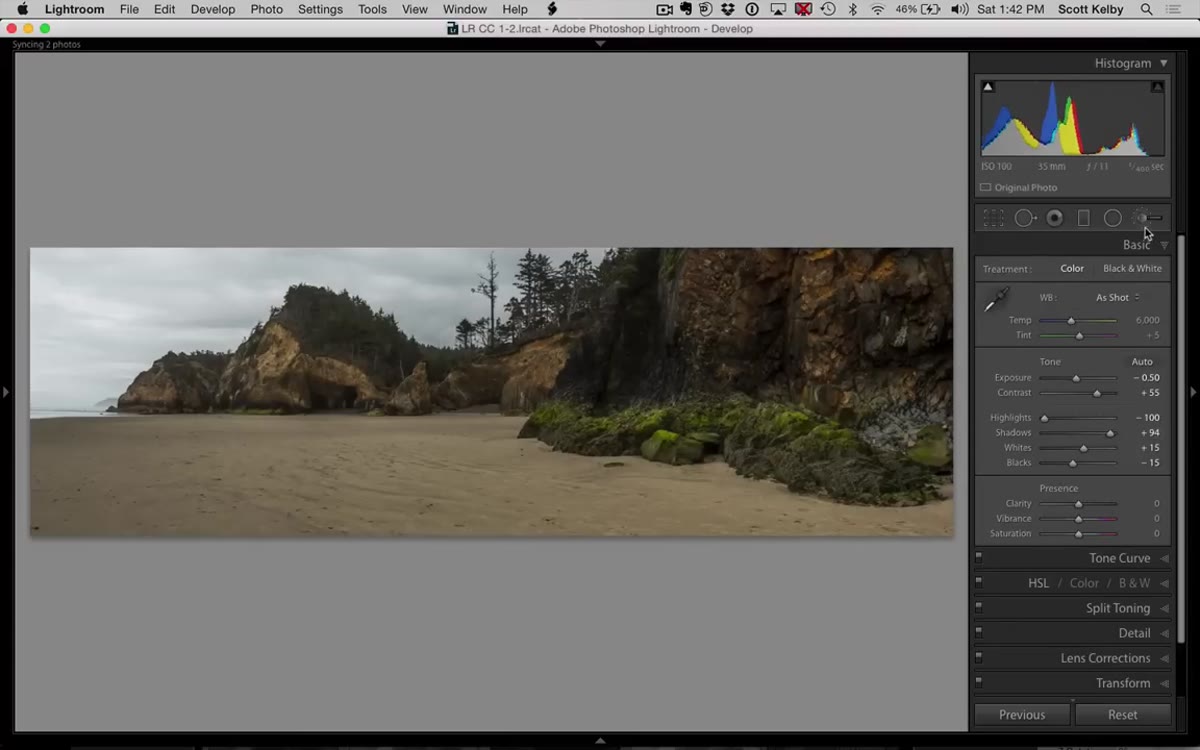 Adjustment brush tool selected, painting over dark foreground areas
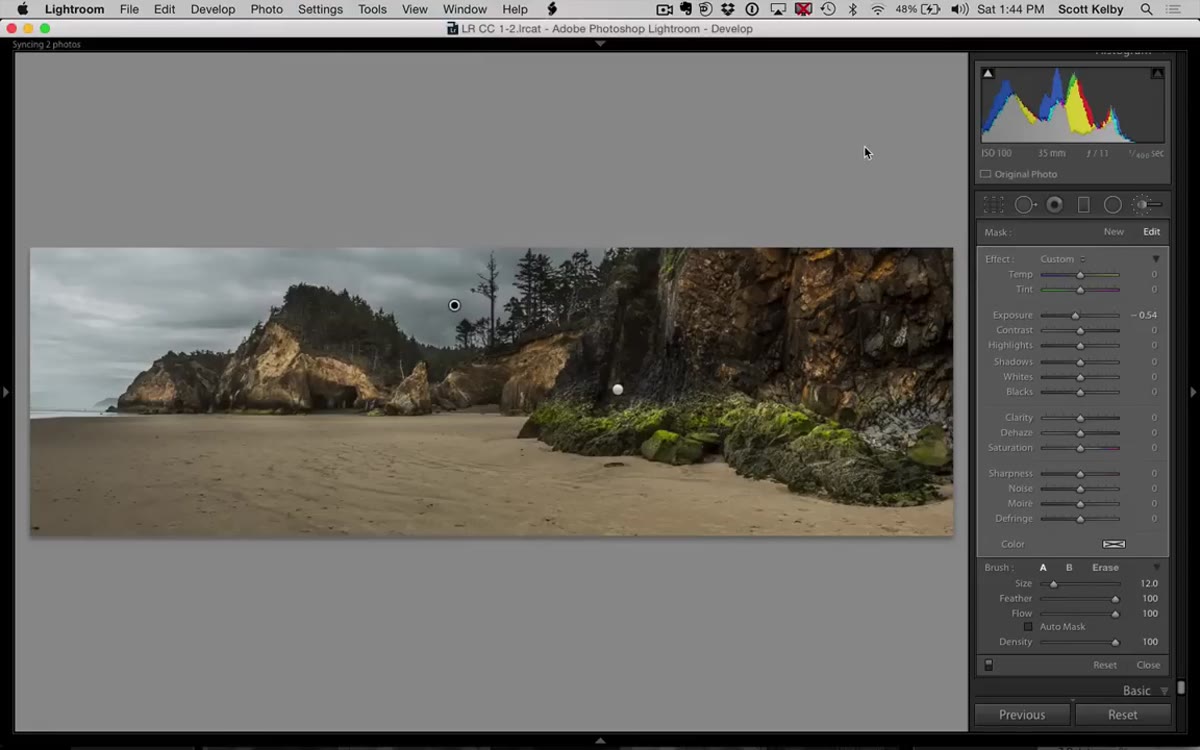
The Adjustment Brush is where you stop treating the image as a single exposure and start treating it like a scene with zones. Set the brush’s Exposure value to roughly one stop higher than your base, then paint over areas that read too dark. Kelby does this to lift the foreground and any shadowed mid-ground elements that got pulled down when you dropped the overall exposure.
The key mistake to avoid: going too strong on the first pass. If the painted area looks obviously brighter than the surrounding image, dial the brush’s Exposure value back. You want the lifted areas to feel like natural light, not like someone turned a flashlight on them. If you paint over an edge you didn’t intend to hit, hold Option on Mac or Alt on Windows to switch the brush to erase mode and clean it up.
Step 4: Add Clarity to Bring Texture and Detail Forward
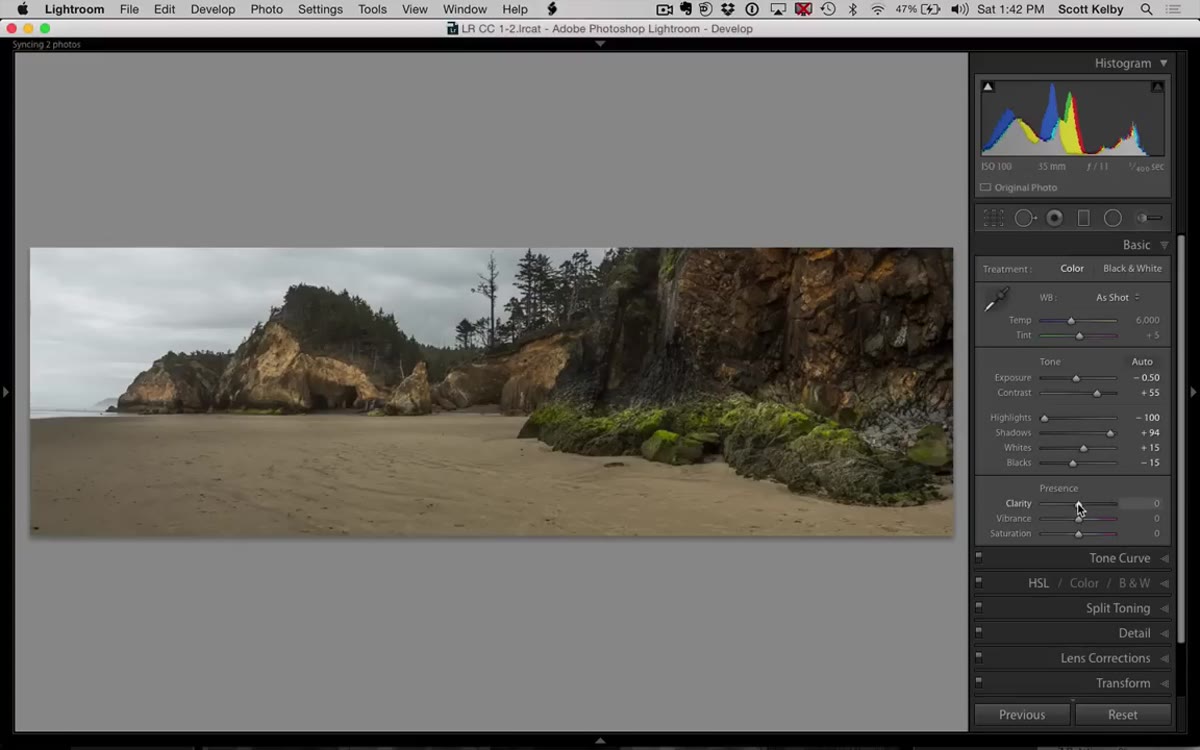 Clarity slider being raised in the Adjustment Brush or Basic panel
Clarity is the slider that makes an HDR panorama feel earned rather than processed. It increases midtone contrast, which translates visually as texture and depth, the feeling that the image has physical presence. Kelby adds Clarity at this stage to give the landscape detail that the merge process can slightly soften.
Don’t stack this aggressively. A moderate Clarity bump on a landscape with rock, water, or foliage reads as crisp. Push it too far and you get that heavy, over-sharpened look that immediately signals “HDR” in a way that distracts from the actual image.
Step 5: Darken the Sky with the Adjustment Brush
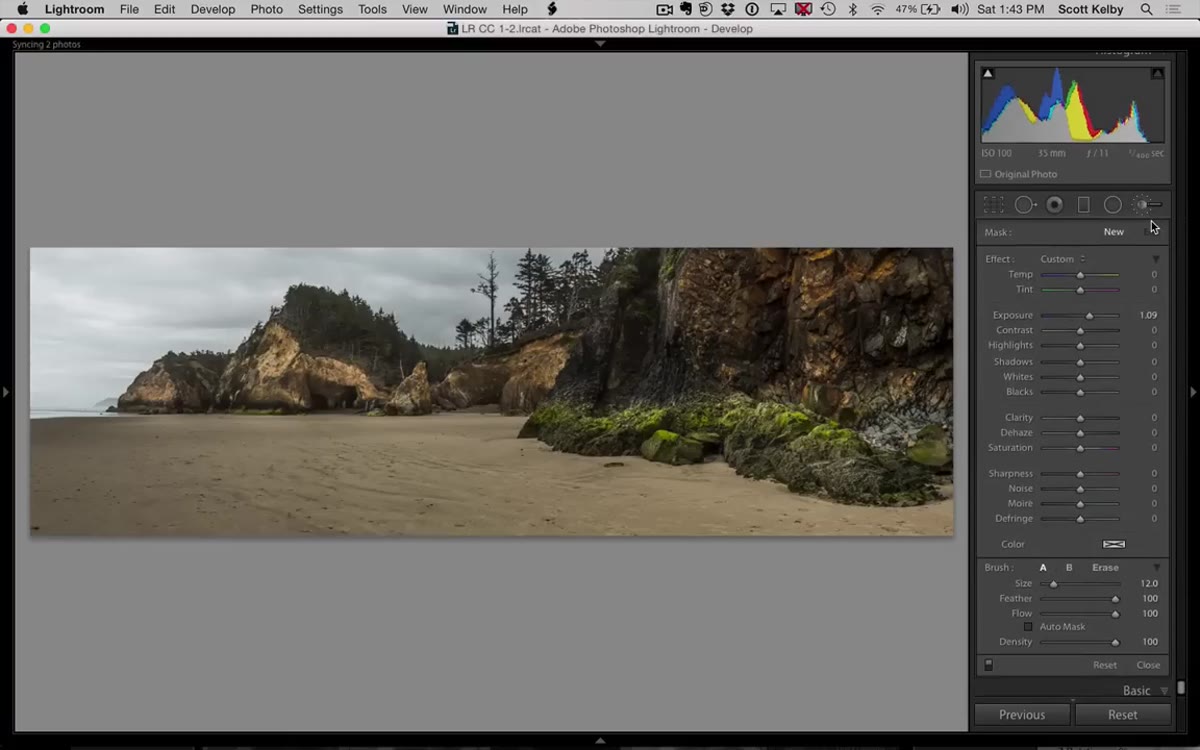 Adjustment brush painting over sky to reduce exposure and add drama
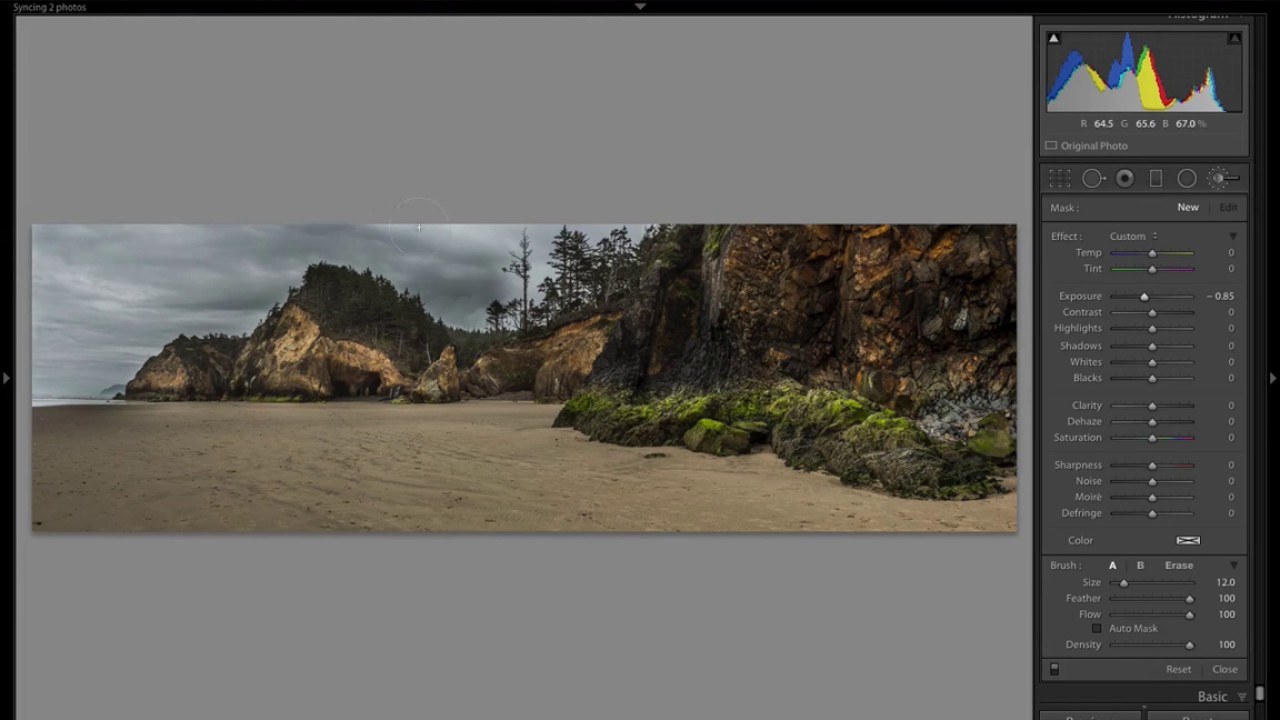
A bright sky on a panorama competes with everything else in the frame. Kelby’s fix is straightforward: grab the Adjustment Brush, set a negative Exposure value, and paint across the sky. This is a manual gradient rather than the Linear Gradient tool, which gives you the ability to follow a treeline or irregular horizon instead of being locked to a straight line.
Don’t worry about being pixel-perfect along the edges of trees or mountains. Painting slightly into the dark areas along the horizon often makes the transition look more natural, not less. The goal is a sky that feels like it has weight and depth, not one that looks like a white ceiling above the landscape.
Step 6: Decide Whether to Stay in Lightroom or Move to Photoshop
 Lightroom menu showing Edit In options including Color Effects Pro 4
This is the fork in the road that separates a quick edit from a fully realized image. Kelby recommends Nik Color Effects Pro 4 (free from Google as of this tutorial) for adding drama, contrast, and atmosphere. You can run it directly from Lightroom via Photo, Edit In, but there’s a real limitation: whatever the plugin does, it does completely. You get no control over opacity or blending.
If you send the file to Photoshop first using Command+E on Mac or Control+E on Windows, you can run Color Effects Pro on a separate layer and then reduce that layer’s opacity to dial back any effect that comes in too hot. For a file that’s already 50 inches wide at high resolution, this workflow takes more time, but the ability to treat the plugin result as a starting point rather than a final answer is worth it. I’ve ruined more than a few panoramas by committing too hard to a plugin effect without that safety net.
What I’d Add: Lock in a Luminosity Mask Before the Sky Brush
One thing Kelby doesn’t cover here, probably because it’s outside the scope of the Lightroom-first workflow, is using luminosity masks before making sky adjustments. When I process HDR panoramas that have complex treelines or mountain ridges, I often move into Photoshop specifically to build a luminosity mask targeting the bright sky tones. This lets me make sky adjustments that automatically respect the transition zone between sky and land, without any manual painting. It takes longer, but on a wide panorama where the horizon runs across 50+ inches of pixels, the cleaner edge is visible at any print size.
If you’re doing this entirely in Lightroom, the Range Mask option inside the Adjustment Brush (available in Lightroom CC and later) gets you partway there. Set the Range Mask to Luminance, sample the sky tones, and your brush will automatically limit its effect to that brightness range.
The single most important thing I took from this tutorial is that HDR panoramas need to be corrected in passes, not in one global adjustment. Each pass, whether it’s the base exposure, the sky, or the shadow areas, is solving a specific problem in a specific zone. Treat the image like a collection of problems to solve rather than a single file to process, and the final result will feel cohesive rather than over-edited.
Watch the full tutorial on YouTube to see Scott Kelby’s exact moves in real time, especially the adjustment brush work, where watching the speed and pressure of the strokes teaches as much as the settings themselves.
Comments
Leave a Comment