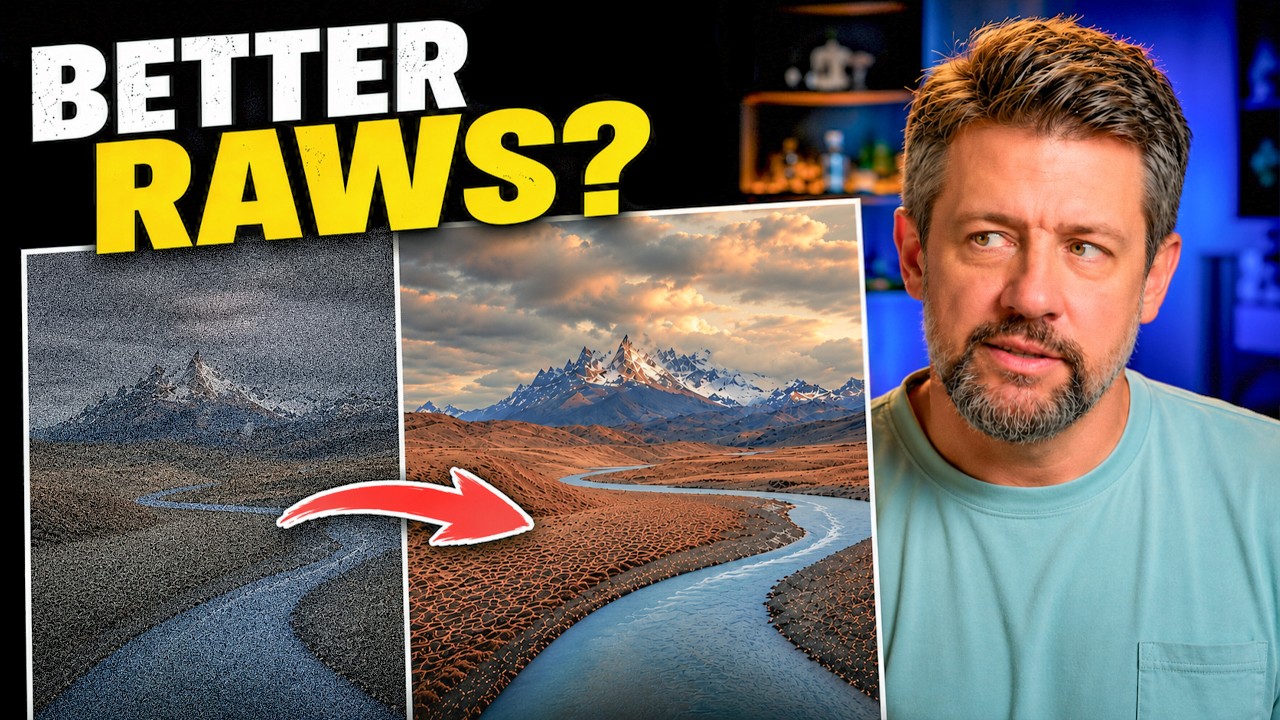
I have a rule about my editing workflow: if it adds more than one extra step, it probably isn’t sticking around. I learned Lightroom under pressure, back when my band couldn’t afford a photographer and someone had to edit our press shots, so lean and fast became a survival instinct that never really left. That instinct has served me well. It has also made me dismiss a lot of genuinely useful tools because I assumed the setup cost wasn’t worth it.
Which is exactly why I kept ignoring DxO PureRAW for years. I’d heard other photographers talk about it the way people talk about cold plunges — with an enthusiasm that made me suspicious. But then I watched Mark Denney walk through it with his own images, side by side, no hand-waving, and something clicked. In this Mark Denney tutorial on DxO PureRAW 6, he makes the case not through feature lists but through actual before-and-after comparisons on high-ISO landscape shots, and the difference is hard to argue with.
The key thing I hadn’t understood before watching this, and the thing that finally made me willing to try it, is that PureRAW doesn’t replace Lightroom. It runs before Lightroom. It’s a RAW conversion step, not an editing tool, and that framing changes everything about how you think about adding it to a workflow you’ve spent years building.
Step 1: Understand What PureRAW Actually Does
 Mark explaining PureRAW is an addition, not a replacement
Before touching any settings, get the mental model right. PureRAW 6 sits at the RAW conversion stage, before your color grading and local adjustments happen in Lightroom. Think of it as the step between your camera’s sensor data and the DNG file you’d normally open. Its job is to handle noise and lens corrections at the demosaicing level, which is earlier in the pipeline than anything Lightroom’s Denoise slider can reach. Lightroom works on already-processed pixel data. PureRAW works on the raw sensor data itself, which gives it more to work with.
Mark explaining PureRAW is an addition, not a replacement
Before touching any settings, get the mental model right. PureRAW 6 sits at the RAW conversion stage, before your color grading and local adjustments happen in Lightroom. Think of it as the step between your camera’s sensor data and the DNG file you’d normally open. Its job is to handle noise and lens corrections at the demosaicing level, which is earlier in the pipeline than anything Lightroom’s Denoise slider can reach. Lightroom works on already-processed pixel data. PureRAW works on the raw sensor data itself, which gives it more to work with.
Step 2: Install PureRAW as a Lightroom Plugin
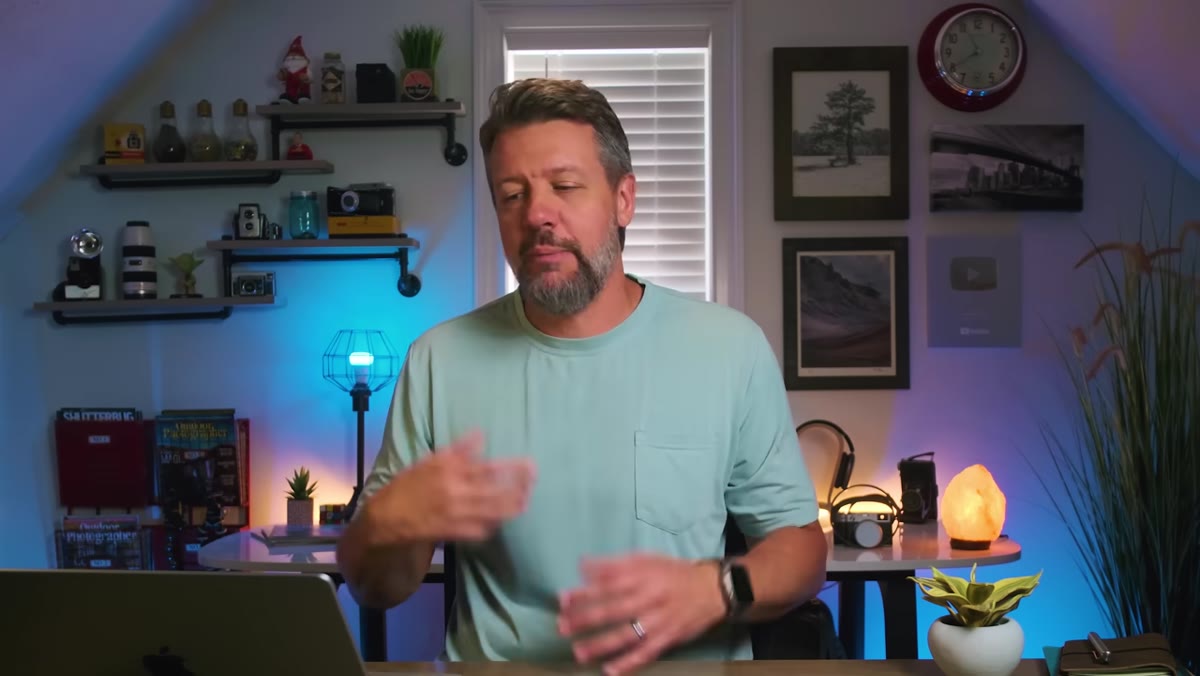 Navigating to File > Plug-in Extras in Lightroom
Once you have PureRAW 6 installed on your machine, it registers itself as a Lightroom plugin automatically. No manual configuration needed. In Lightroom Classic, go to File, then Plug-in Extras, and you’ll see DxO PureRAW 6 listed there. Mark notes that he didn’t have to jump through any technical hoops to get it showing up, which matches my experience. The plugin installs and connects itself. If you want to use it from Photoshop instead, that path exists too, but the Lightroom integration is the cleanest entry point for most landscape and travel photographers already living inside that catalog system.
Navigating to File > Plug-in Extras in Lightroom
Once you have PureRAW 6 installed on your machine, it registers itself as a Lightroom plugin automatically. No manual configuration needed. In Lightroom Classic, go to File, then Plug-in Extras, and you’ll see DxO PureRAW 6 listed there. Mark notes that he didn’t have to jump through any technical hoops to get it showing up, which matches my experience. The plugin installs and connects itself. If you want to use it from Photoshop instead, that path exists too, but the Lightroom integration is the cleanest entry point for most landscape and travel photographers already living inside that catalog system.
Step 3: Select Your RAW File and Send It to PureRAW
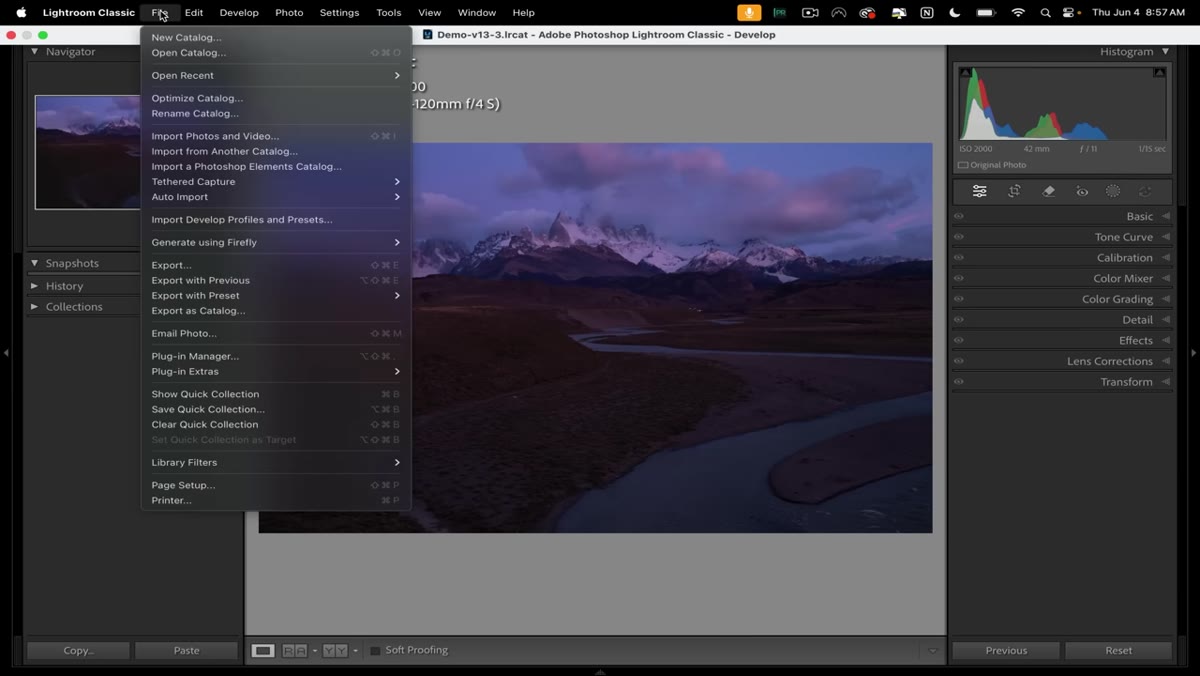 Selecting a RAW file in Lightroom before launching the plugin
In Lightroom, select the RAW file you want to process. Don’t develop it first. Don’t add any adjustments. PureRAW wants the original, untouched RAW data. Once selected, go to File, Plug-in Extras, and choose “Preview and Process with DxO PureRAW 6.” The file opens inside the PureRAW interface. Mark’s example here is a Patagonia shot captured at ISO 2000, 1/15 of a second, f/11, on a brutally windy morning where even a tripod wasn’t enough to prevent camera shake. High-ISO files in difficult conditions are exactly the scenario where this tool earns its place.
Selecting a RAW file in Lightroom before launching the plugin
In Lightroom, select the RAW file you want to process. Don’t develop it first. Don’t add any adjustments. PureRAW wants the original, untouched RAW data. Once selected, go to File, Plug-in Extras, and choose “Preview and Process with DxO PureRAW 6.” The file opens inside the PureRAW interface. Mark’s example here is a Patagonia shot captured at ISO 2000, 1/15 of a second, f/11, on a brutally windy morning where even a tripod wasn’t enough to prevent camera shake. High-ISO files in difficult conditions are exactly the scenario where this tool earns its place.
Step 4: Read the Preview Comparison Before Processing
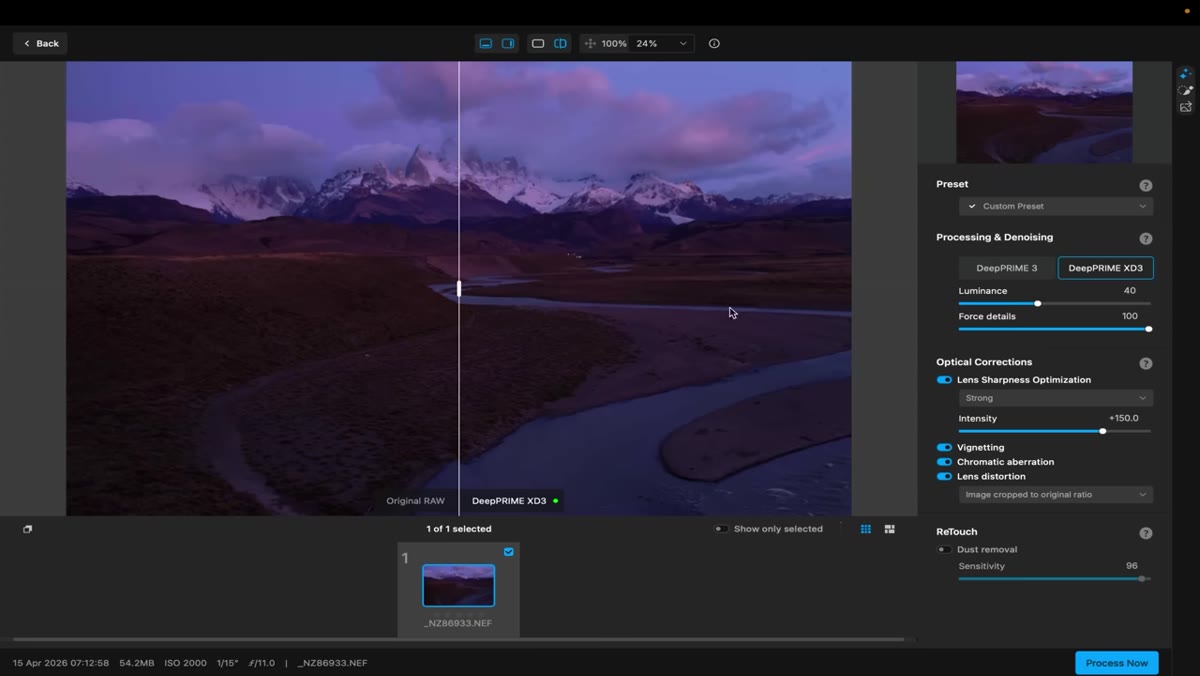 Side-by-side preview of RAW file vs PureRAW conversion
PureRAW opens a split-screen preview: your original RAW on the left, the processed version on the right. Zoom in before you commit to processing. Mark zooms into the textured areas of his Patagonia image, and the difference in that preview is not subtle. The original shows that chalky, luminance-noise texture that degrades fine details like rock faces, grass, or bark. The PureRAW version shows actual resolved detail, not a smoothed-over approximation. This preview matters because it calibrates your expectations. You’re not looking at sharpening. You’re looking at detail that was already there in the sensor data but buried under noise generated during demosaicing.
Side-by-side preview of RAW file vs PureRAW conversion
PureRAW opens a split-screen preview: your original RAW on the left, the processed version on the right. Zoom in before you commit to processing. Mark zooms into the textured areas of his Patagonia image, and the difference in that preview is not subtle. The original shows that chalky, luminance-noise texture that degrades fine details like rock faces, grass, or bark. The PureRAW version shows actual resolved detail, not a smoothed-over approximation. This preview matters because it calibrates your expectations. You’re not looking at sharpening. You’re looking at detail that was already there in the sensor data but buried under noise generated during demosaicing.
Step 5: Process the File and Return to Lightroom
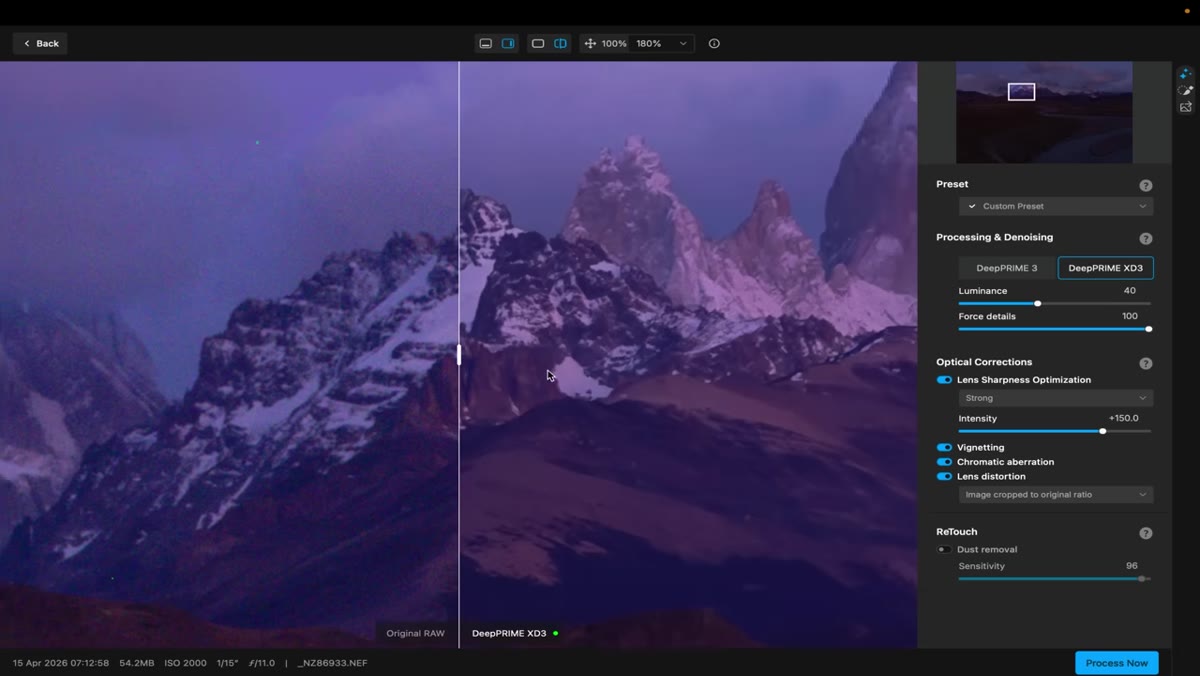 PureRAW processing a high-ISO Patagonia landscape file
Once you’ve confirmed the preview looks right, run the processing. PureRAW applies its DeepPRIME XD2 algorithm, which uses a neural network trained on real lens and sensor combinations, to the raw file and outputs a new DNG. That DNG lands back in your Lightroom catalog, stacked with the original, ready for your normal editing process. Nothing about your Lightroom workflow changes from this point forward. You open the DNG, grade it, mask it, do whatever you’d normally do. The only difference is you’re starting from a file with dramatically better base quality than the camera-generated RAW would have given you on its own.
PureRAW processing a high-ISO Patagonia landscape file
Once you’ve confirmed the preview looks right, run the processing. PureRAW applies its DeepPRIME XD2 algorithm, which uses a neural network trained on real lens and sensor combinations, to the raw file and outputs a new DNG. That DNG lands back in your Lightroom catalog, stacked with the original, ready for your normal editing process. Nothing about your Lightroom workflow changes from this point forward. You open the DNG, grade it, mask it, do whatever you’d normally do. The only difference is you’re starting from a file with dramatically better base quality than the camera-generated RAW would have given you on its own.
Step 6: Edit the Processed DNG as You Normally Would
 Edited final image from Patagonia shown in Lightroom develop module
This is the part that matters for workflow skeptics like me. After PureRAW hands the file back, you’re in familiar territory. No new panels to learn, no new export logic, no extra catalog to manage. Open the DNG in Develop, pull your highlights, push your shadows, work your local adjustments. The noise handling is already done, which means you can be more aggressive with exposure recovery and shadow lifting without amplifying grain. That’s where you start to feel the real compounding benefit. A cleaner base file gives you more editing latitude, which means your final image isn’t fighting noise at every adjustment stage.
Edited final image from Patagonia shown in Lightroom develop module
This is the part that matters for workflow skeptics like me. After PureRAW hands the file back, you’re in familiar territory. No new panels to learn, no new export logic, no extra catalog to manage. Open the DNG in Develop, pull your highlights, push your shadows, work your local adjustments. The noise handling is already done, which means you can be more aggressive with exposure recovery and shadow lifting without amplifying grain. That’s where you start to feel the real compounding benefit. A cleaner base file gives you more editing latitude, which means your final image isn’t fighting noise at every adjustment stage.
One Thing I’d Add From My Own Experience
If you shoot in mixed conditions, meaning some frames from a session at ISO 400 and others at ISO 3200, don’t run everything through PureRAW by default. On low-ISO files with minimal noise, the processing time isn’t justified and the difference is negligible. I use it selectively, flagging any file shot above ISO 800 or in low-contrast flat light where noise tends to hide until you push the shadows. Running PureRAW on your problem files and your Lightroom Denoise slider on the rest keeps the workflow fast without leaving quality on the table.
The single most important idea Mark surfaces in this tutorial is also the simplest: a better RAW file going into your edit means a better image coming out, regardless of how skilled your Lightroom technique is. Garbage in, garbage out is a cliche because it’s accurate. PureRAW doesn’t change your editing. It changes what your editing has to work with.
Watch the full tutorial on YouTube to see Mark’s side-by-side comparisons directly. The visual evidence he puts on screen makes a stronger argument than any description of the tool’s features.
Comments (5)
Solid advice. Especially the part about taking your time with it.
Wow, I had no idea you could do this. Mind blown.
Great article! I actually covered something related on my site — the business angle is really complementary to this.
I keep coming back to this article. It's that useful.
I've watched a dozen tutorials on this and yours is the clearest by far.
Leave a Comment